Seed Guides

Buy

Beginner 5 min read

Introduction

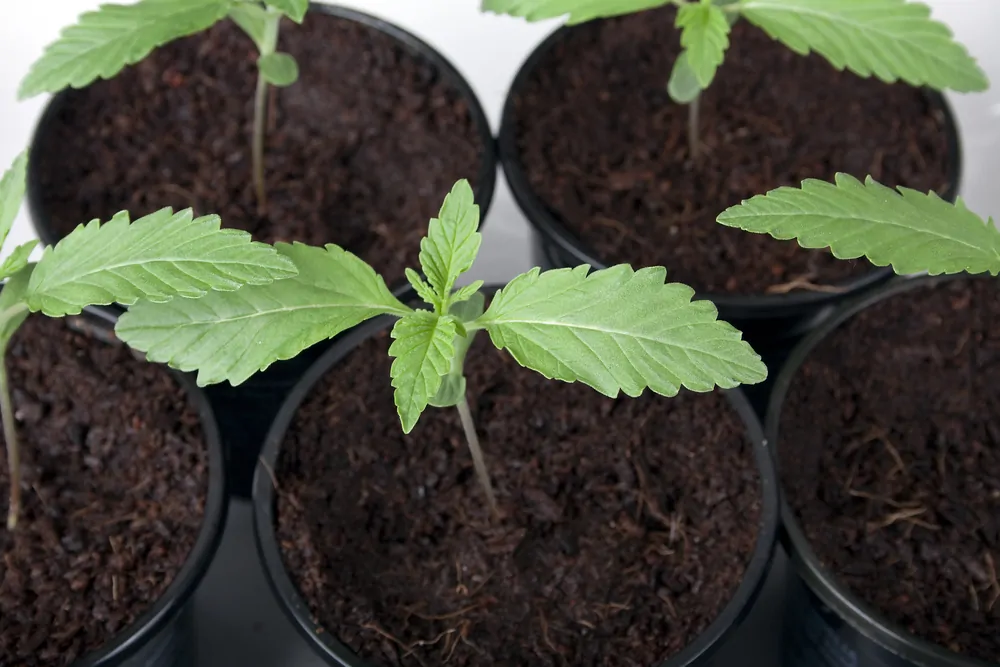
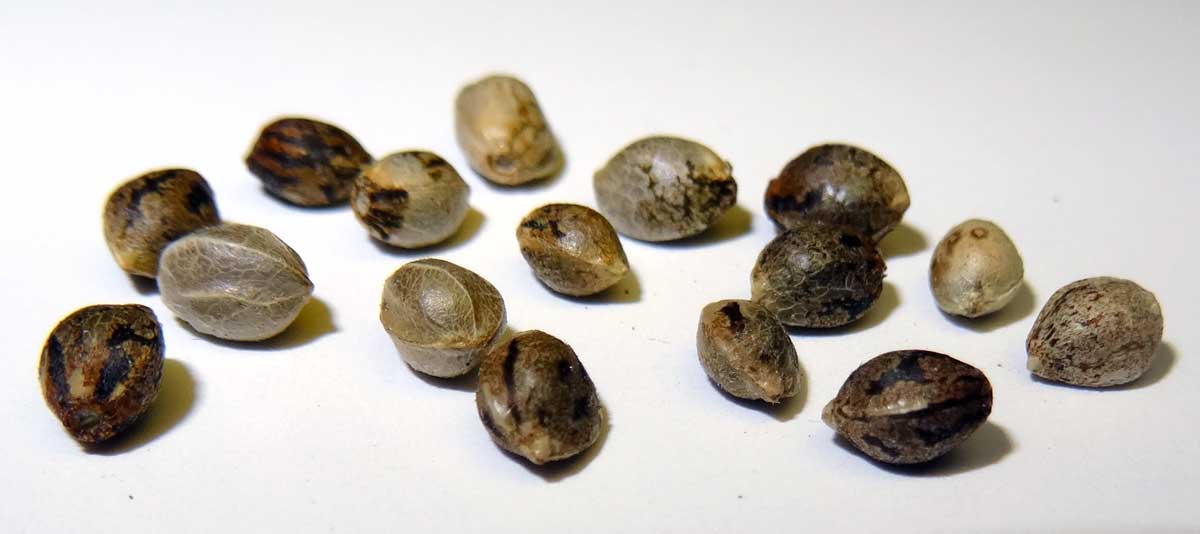
Buying cannabis seeds is the most consequential decision you will make before a grow. No amount of premium fertilizer, high-end lighting, or expert technique can compensate for poor genetics. The ceiling of your harvest — its potency, aroma, yield, and structure — is set the moment you choose your seeds. This guide walks you through everything you need to know to make that choice with confidence.

Selection of cannabis seeds from reputable seed banks ready for purchase

Understanding Seed Types

When browsing a seed bank, you will encounter three main categories. Each serves a different purpose, and choosing the right one for your setup is the first real decision of your grow.

Regular Seeds

Regular seeds are unmodified and will produce approximately 50% male and 50% female plants. They are the choice of breeders and experienced growers who want to work with natural genetics, create their own crosses, or preserve a strain's original gene pool. The tradeoff is that males must be identified and removed before they pollinate the females — a process that requires experience and attentiveness.

Feminized Seeds

Feminized seeds are produced through a controlled process that eliminates the Y chromosome, resulting in a near-100% chance of growing female plants. Since only females produce the resinous buds growers are after, feminized seeds eliminate the need to sex plants and allow every seed you germinate to contribute to your final harvest. They are the most practical choice for the vast majority of cultivators.
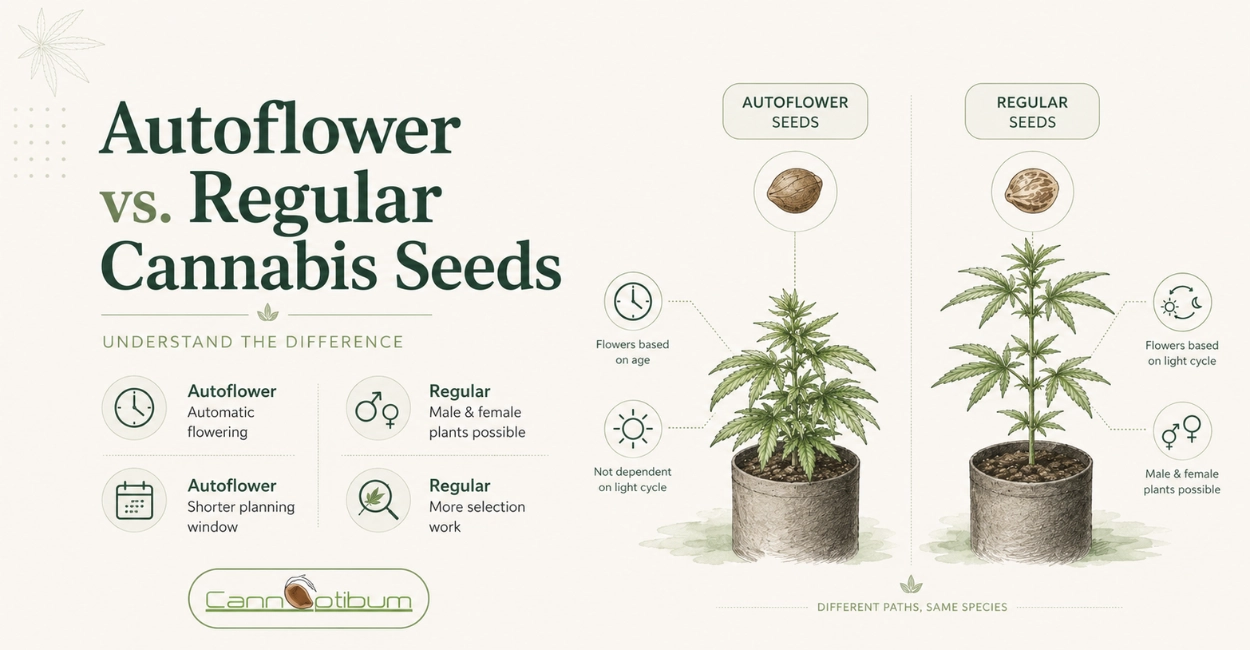
Autoflowering Seeds

Autoflowering seeds contain genetics from Cannabis ruderalis, a subspecies native to cold, northern climates with short summers. Unlike photoperiod strains, autos flower based on age rather than light cycle — typically transitioning automatically after 3–4 weeks of vegetative growth regardless of how many hours of light they receive. They stay compact, finish fast (often 70–85 days from seed to harvest), and are highly resilient. They are ideal for small indoor spaces, balcony grows, or growers who want multiple harvests per season outdoors.

Comparison of regular, feminized, and autoflowering cannabis seeds side by side

Genetics: Indica, Sativa, and Hybrids

Beyond seed type, the genetic background of a strain determines its growth structure, flowering time, and the character of its effects. Understanding the broad categories helps you match a strain to your space and goals.

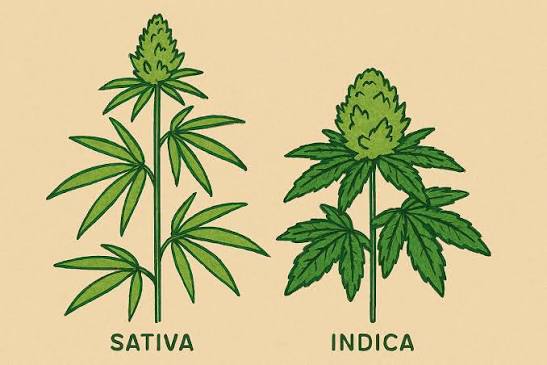
  • Indica: compact and bushy with broad leaves, shorter flowering times of 7–9 weeks, and effects that tend toward physical relaxation and sedation. Well suited to indoor growing where vertical space is limited.
  • Sativa: tall and stretchy with narrow leaves, longer flowering times of 10–14+ weeks, and effects that lean toward cerebral stimulation and energy. Better suited to outdoor or greenhouse environments with ample vertical space.
  • Hybrid: the majority of modern commercial strains are hybrids, combining traits from both parents. Effects and growth patterns depend on which side dominates — a good breeder will specify whether a hybrid is indica- or sativa-leaning.

Visual comparison of indica, sativa and hybrid cannabis plant structures

What to Look for in a Seed Bank

The seed bank you buy from matters as much as the strain you choose. A reputable bank maintains genetic consistency across batches, tests for germination rates, and stands behind the quality of what they sell. When evaluating a seed bank, consider:

  • Track record: how long have they been operating? Established banks with years of customer reviews are a safer bet than new or obscure retailers.
  • Verified genetics: do they work directly with breeders, or are they reselling unchecked stock? Banks that collaborate with named breeders and provide detailed strain information are more trustworthy.
  • Germination guarantees: some banks offer replacement seeds if germination rates fall below a stated threshold. This is a strong signal of confidence in their product.
  • Stealth shipping: if you live in a region where seeds may be intercepted by customs, look for banks that offer discreet packaging — seeds concealed inside everyday objects such as pens, magazines, or clothing. Many reputable banks also offer guaranteed reshipment if an order is seized.
  • Payment options and discretion: bank transfers, cryptocurrency, or cash payments are common in the cannabis seed industry due to banking restrictions. A bank that offers multiple discreet payment options is a good sign.

Cannabis seed bank website showing strain selection and purchase options

Some Well-Regarded Seed Banks

The following are among the most established and respected names in the industry, each known for a particular strength:

  • Sensi Seeds: one of the oldest banks in Europe, with a vast catalogue spanning decades of breeding history. Reliable for classic genetics.
  • Dutch Passion: pioneers of the feminized seed, with a strong focus on quality control and innovation.
  • Mephisto Genetics: widely considered the leading name in modern autoflowering genetics, known for exceptional potency and terpene profiles in their autos.
  • Barney's Farm: a strong choice for exotic, high-THC photoperiod strains with impressive yield potential.
  • Humboldt Seed Company: highly regarded for their outdoor and full-season genetics, with deep roots in California's legacy cannabis culture.

Reading a Seed Listing

Before purchasing, learn to read strain listings critically. A good listing will include:

  • Genotype: the parent strains used in the cross.
  • Flowering time: typically expressed in weeks from the onset of flowering (for photoperiod) or from seed (for autos).
  • Expected yield: given in grams per square metre indoors or grams per plant outdoors. Treat these as optimistic estimates under ideal conditions.
  • THC and CBD percentages: approximate values based on lab testing of phenotypes selected by the breeder.
  • Terpene profile or aroma description: useful for choosing strains that match your taste preferences.

Detailed cannabis strain listing showing genetics, flowering time, yield and THC percentage

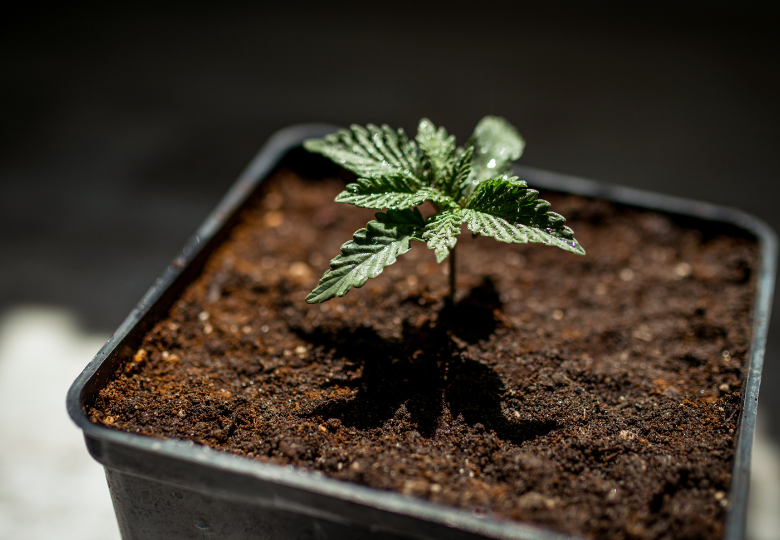
How Many Seeds to Buy

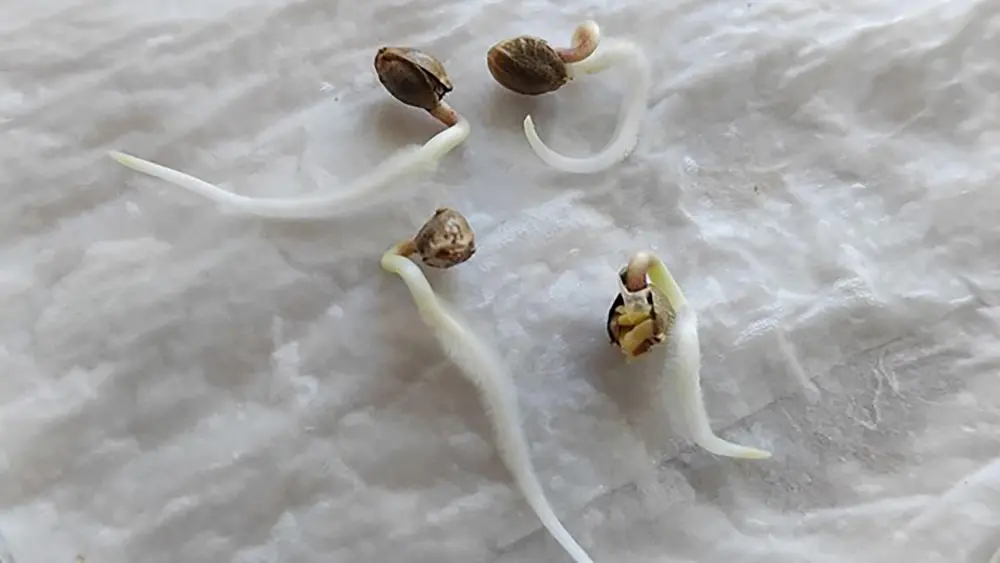
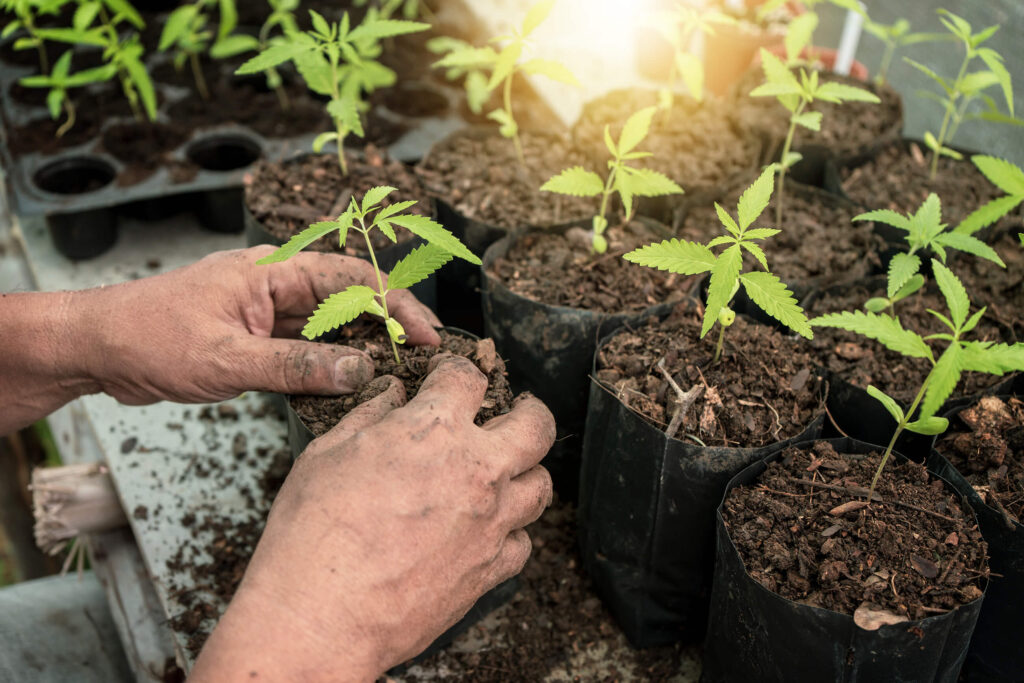
If you are growing a strain for the first time, buy more seeds than you think you need. Packs of 3, 5, or 10 are standard. Growing multiple seeds from the same batch lets you select the best phenotype — the individual plant that expresses the most desirable traits — and potentially take clones from it for future grows. A single seed gives you a single shot; a pack of 5 gives you the opportunity to find something exceptional.

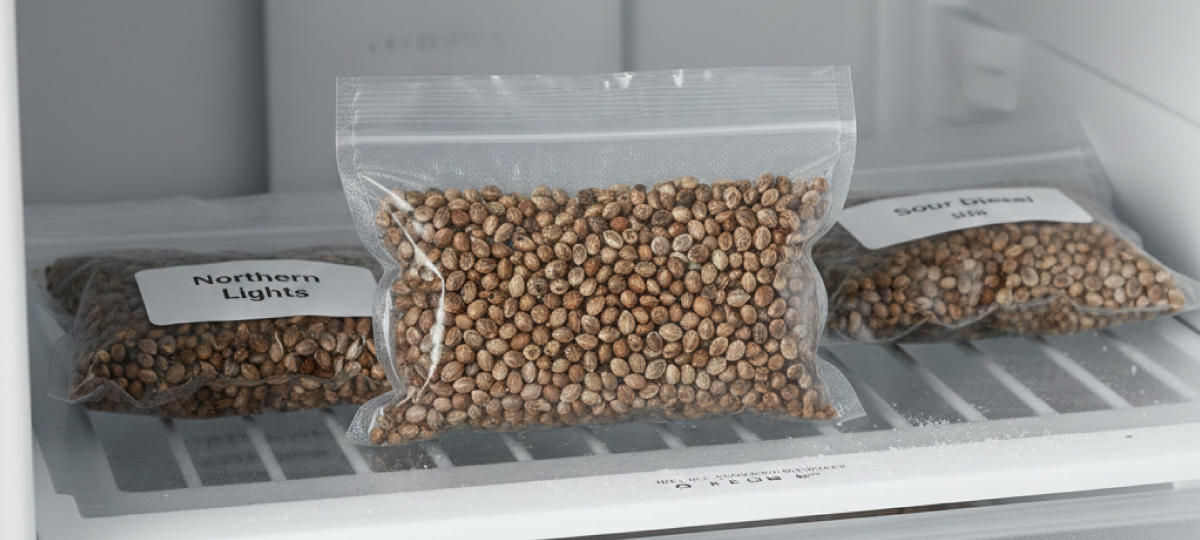
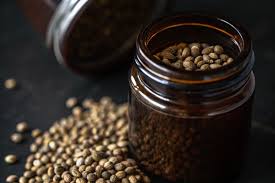
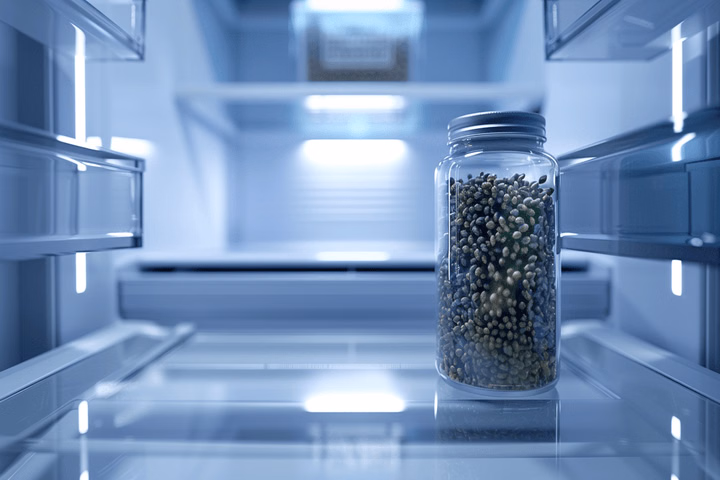
Storing Seeds After Purchase

If you do not plan to germinate immediately, store your seeds correctly from the moment they arrive. Keep them in their original sealed packaging inside an airtight container with a silica gel desiccant, and place the container in the refrigerator. Properly stored seeds remain viable for 5 years or more.

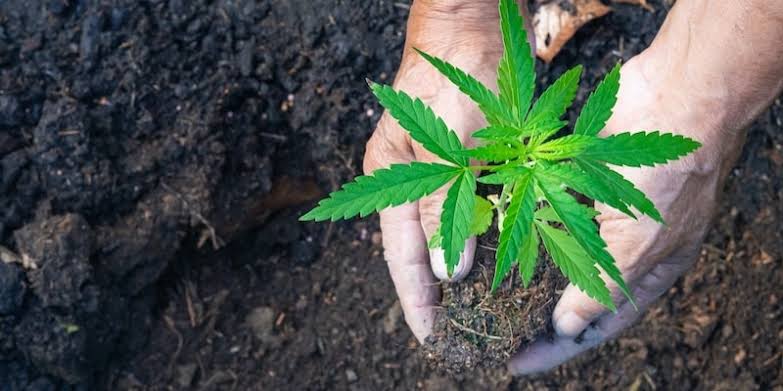
Choosing the right seeds is not about finding the strain with the highest advertised THC percentage. It is about matching genetics to your environment, your skill level, and your goals. Take the time to research before you buy, and that investment will pay dividends at every stage of the grow.


Seeds Conservation

Beginner 5 min read

Introduction

Cannabis seeds are living organisms. Inside each seed, a tiny embryo waits in a state of dormancy, its viability slowly declining over time if not stored correctly. Proper conservation can keep seeds viable for 5 to 10 years or more, while poor storage can render them useless within a single season. This guide covers everything you need to know to store your cannabis seeds like a professional.

Collection of cannabis seeds ready for long-term storage

Understanding Seed Viability

A seed's viability refers to its ability to germinate successfully. Fresh seeds from a reputable breeder typically have germination rates above 90%. As seeds age, this rate declines — but the speed of decline depends almost entirely on storage conditions. The three main enemies of seed viability are:

  • Humidity: moisture activates metabolic processes inside the seed, accelerating aging and promoting mold.
  • Heat: high temperatures degrade the genetic material and deplete the seed's energy reserves.
  • Light: UV exposure breaks down the seed coat and the lipids that protect the embryo.

Control these three factors and your seeds will last for years. Fail to control them and you may find your collection unresponsive in as little as a few months.

Short-Term Storage (Up to 1 Year)

If you plan to use your seeds within the next growing season, short-term storage is straightforward. Keep them in their original breeder packaging — most use foil or mylar pouches that provide adequate light and moisture protection — and place them in a cool, dark drawer or cupboard away from heat sources.

  • Ideal temperature: 6–8°C (42–46°F) — a dedicated drawer in a cool room works fine.
  • Ideal humidity: 20–30% RH
  • Container: original packaging or a small airtight glass jar

Avoid storing seeds in the kitchen or bathroom where temperature and humidity fluctuate constantly.

Cannabis seeds stored in airtight glass jars for short-term conservation

Long-Term Storage (1–10+ Years)

For long-term preservation, you need to be more deliberate. The goal is to bring both temperature and humidity as low as safely possible without damaging the seed.

The Ideal Container

Use small, airtight glass jars — Mason jars or similar — with rubber-sealed lids. Glass does not off-gas chemicals the way plastic can, and a proper seal keeps external humidity out completely. Label each jar with the strain name, breeder, and date of storage.

Desiccants

Include a small silica gel packet inside each jar to absorb residual moisture. Food-grade silica gel is widely available and reusable — simply dry it in an oven at low heat when it becomes saturated. Aim for an internal humidity of 20–25% RH inside the jar. Some growers use a humidity indicator card alongside the silica gel to monitor conditions at a glance.

Silica gel desiccant packet inside a sealed jar with cannabis seeds

Temperature

The refrigerator is the most accessible long-term storage option for home growers. Set it to the coldest stable zone — typically 4–6°C (39–43°F) — and place your sealed jars in the back, away from the door where temperature fluctuates every time it opens.

For very long-term storage (5+ years), the freezer is an option — but only if seeds are bone dry (below 10% RH) before freezing. Any residual moisture will expand upon freezing and rupture the seed's cells. If you freeze seeds, never open the jar until it has returned to room temperature to avoid condensation forming inside.

Refrigerator vs. Freezer: Which Should You Use?

  • Refrigerator: ideal for seeds you plan to use within 1–5 years. Easy access, no risk of freeze damage, stable conditions.
  • Freezer: suitable for archival storage of 5–10+ years. Requires perfectly dry seeds and careful thawing protocol. Best for breeders preserving rare genetics.

For most home growers, the refrigerator is the right choice. The freezer is reserved for seeds you genuinely do not plan to touch for many years.

Labeled glass jars with cannabis seeds stored in a refrigerator

What to Avoid

  • Plastic zip-lock bags: not airtight enough and allow humidity to fluctuate.
  • Warm spots: on top of the fridge, near a boiler, or in a car glove compartment — all too warm.
  • Repeated temperature cycling: taking seeds in and out of the fridge frequently causes condensation and degrades viability faster than stable room-temperature storage.
  • Direct sunlight: even brief exposure accelerates degradation of the seed coat.
  • High humidity environments: a damp basement or greenhouse shelf is one of the worst places to store seeds.

Testing Viability Before You Grow

Before committing an entire jar of stored seeds to a grow, it's worth running a simple germination test. Take 5–10 seeds from the batch and attempt to germinate them using your standard method. If 8 out of 10 germinate, your storage has been successful. If fewer than 5 sprout, the remaining seeds may have reduced vigor and you should plant more than usual to compensate.

Germination test on paper towel to check cannabis seed viability

Organizing Your Seed Collection

As your collection grows, organization becomes essential. Consider maintaining a simple spreadsheet or notebook with the following for each lot:

  • Strain name and breeder
  • Date of purchase or harvest
  • Number of seeds
  • Storage location (jar label, fridge shelf)
  • Last germination test result

This prevents you from accidentally letting rare genetics expire unnoticed, and helps you plan your grows around seed age — using older stock first while fresher seeds remain safely stored.

Preserving Your Own Seeds

If you breed your own seeds or collect them from pollinated females, allow them to fully mature on the plant before harvesting. Seeds should be hard, dark, and tiger-striped — pale or soft seeds are immature and will have poor viability regardless of storage conditions. After harvest, dry seeds at room temperature in a dark, low-humidity space for 1–2 weeks before placing them into long-term storage.

With the right container, desiccant, and temperature, your seed collection becomes a living library of genetics — ready to germinate reliably years from now, exactly when you need them.


Transplant

Beginner 5 min read

Introduction

Transplanting cannabis seedlings is one of the most delicate operations in the cultivation cycle. Done correctly, it gives your plants the space they need to develop a strong root system without interruption. Done poorly, it can cause transplant shock that sets growth back by days or even weeks. This guide walks you through when to transplant, how to prepare, and how to execute the move with minimal stress to your plants.

Young cannabis seedling ready for transplanting into a larger container

Why Transplanting Matters

Cannabis roots need space to grow. When a plant outgrows its container, the roots begin to circle the walls — a condition known as being rootbound. A rootbound plant cannot uptake water and nutrients efficiently, growth stalls, and deficiencies may appear even when feeding is correct. Transplanting into a larger container at the right moment allows the root system to expand freely, directly translating into faster vegetative growth and larger yields at harvest.

When to Transplant

Timing is critical. Transplant too early and the small root ball may fall apart when removed from the container. Transplant too late and the plant is already stressed from being rootbound. Look for these signals:

  • Roots emerging from drainage holes: a clear sign the plant has filled its current container.
  • Rapid water uptake: if the pot dries out significantly faster than usual, roots have likely colonized all available substrate.
  • Canopy size relative to pot size: a general rule of thumb is to transplant when the plant's canopy is roughly twice the diameter of the pot.
  • Leaf count: many growers transplant from a starter plug or small cup once the seedling has developed its first 2–3 sets of true leaves.

Cannabis plant showing roots emerging from drainage holes indicating it is ready to transplant

Choosing the Right Container Size

Do not jump directly from a seedling plug to a 20-litre final pot. Oversized containers hold too much moisture relative to the plant's water uptake, increasing the risk of overwatering and root rot. A staged approach works best:

  • Stage 1: germination plug or 0.1–0.5L solo cup
  • Stage 2: 1–2L container
  • Stage 3: 5–7L container
  • Final container: 11–25L depending on strain and desired plant size

Auto-flowering strains are an exception — they perform best with only one or two transplants at most, as root disturbance can cost precious time in their fixed lifecycle. Many auto growers germinate directly into the final container.

Preparing for the Transplant

Preparation reduces the time the roots are exposed and minimizes stress. Before you begin:

  • Water the plant 24 hours before transplanting: moist substrate holds together better than dry substrate when removed from the pot, protecting the root ball.
  • Pre-fill the new container: fill the new pot with fresh, lightly moistened substrate. Create a hole in the center the same size as the current root ball.
  • Have everything within reach: new container, substrate, water with pH adjusted to 6.0–6.5, and any rooting stimulator you intend to use.

New container pre-filled with substrate and a hole ready to receive the transplanted root ball

Step-by-Step: How to Transplant

Follow these steps for a clean, low-stress transplant:

  • Step 1: Place one hand over the top of the current pot with the plant stem between your fingers. Invert the pot gently and tap the bottom to release the root ball. Do not pull the stem.
  • Step 2: Inspect the root ball briefly. Healthy roots are white and firm. Brown or slimy roots indicate a problem that should be addressed before transplanting.
  • Step 3: Place the root ball into the pre-dug hole in the new container. The top of the root ball should sit slightly below the rim of the new pot.
  • Step 4: Gently fill in around the root ball with fresh substrate. Do not pack it tightly — roots need air pockets to thrive.
  • Step 5: Water lightly around the perimeter of the root ball, not directly on top of it. This encourages roots to grow outward into the new substrate.

Step by step cannabis transplant process showing root ball being placed into new container

Using Rooting Stimulators

Rooting stimulators containing mycorrhizal fungi, humic acids, or auxins (such as IBA — indole-3-butyric acid) can significantly reduce transplant shock and accelerate root colonization of the new substrate. Apply them either by dusting the root ball lightly before placing it in the new pot, or by adding them to the first watering after transplant as a root drench. They are not mandatory, but they are a worthwhile investment for growers who transplant frequently.

Post-Transplant Care

The 48–72 hours following a transplant are the most sensitive. During this window:

  • Reduce light intensity slightly: less light means less transpiration demand on a root system that is not yet fully established in its new environment.
  • Maintain high humidity: 60–70% RH helps the plant retain moisture through its leaves while roots recover. A humidity dome over small transplants is ideal.
  • Do not feed: fresh substrate contains enough nutrients for the first week. Adding fertilizer to a stressed plant compounds the stress.
  • Watch for wilting: mild drooping in the hours after transplant is normal. If wilting persists beyond 24 hours, check moisture levels and light intensity.

Freshly transplanted cannabis seedling under reduced light with humidity dome in place

Transplant Shock: Causes and Recovery

Transplant shock manifests as wilting, yellowing of lower leaves, or a sudden pause in growth. It is caused by root damage or stress during the move. To minimize it:

  • Never transplant during the hottest part of the day or when lights are at full intensity.
  • Work quickly — the less time roots are exposed to air, the better.
  • Avoid breaking up the root ball unnecessarily.

Most healthy plants recover from mild transplant shock within 2–4 days. If recovery takes longer than a week, inspect the roots for rot or damage and adjust your watering and environment accordingly.

Transplanting into the Final Container

The last transplant before flowering is the most important. This is where the plant will spend the majority of its life, so getting the substrate mix and drainage right matters more than at any previous stage. Ensure the final container has adequate drainage holes, use a well-aerated substrate appropriate for your feeding style, and consider top-dressing with a slow-release amendment if you are growing organically.

After the final transplant, give the plant 5–10 days to settle into its new container before initiating the flowering photoperiod. This brief recovery window allows the root system to begin colonizing the new space, setting the stage for a vigorous and productive flowering phase.

A well-executed transplant is invisible in the final result — the plant simply keeps growing as if nothing happened. Master this skill and you remove one of the most common causes of setbacks in indoor cultivation.


Watering

Beginner 5 min read

Introduction

Watering cannabis seeds correctly is one of the most overlooked aspects of early cultivation. Seeds and freshly sprouted seedlings are extremely sensitive to both overwatering and underwatering — mistakes at this stage can prevent germination entirely or kill a seedling within days of emergence. This guide covers the correct approach to moisture management from the moment a seed enters the substrate until it establishes itself as a young seedling.

Cannabis seeds being watered carefully during germination phase

The Core Principle: Moisture Without Saturation

Seeds do not drink water the way established plants do. They absorb moisture through their outer shell via osmosis, using that humidity to trigger the germination process. What they need is a consistently moist environment — not a wet one. Saturated substrate suffocates the seed, depriving it of oxygen and promoting fungal pathogens like Pythium (damping off), which can collapse a seedling at the base of its stem seemingly overnight.

Think of the ideal moisture level as a wrung-out sponge: damp throughout, but with no water dripping out when squeezed.

Watering Before Planting

Always pre-moisten your substrate before placing seeds. Dry substrate draws moisture away from the seed unevenly, and watering after planting risks washing the seed too deep or disturbing its position. To pre-moisten correctly:

  • Add water gradually to your substrate mix and turn it by hand until it reaches the wrung-out sponge consistency.
  • Check pH before mixing: aim for 6.0–6.5 for soil, 5.8–6.2 for coco coir.
  • Fill your container and firm it gently — not tightly — before making the seed hole.

Pre-moistening cannabis substrate before planting seeds

How Much Water After Planting

Once the seed is placed and covered, resist the urge to water heavily. Instead, use a fine misting spray bottle to lightly mist the surface of the substrate directly above the seed. This prevents compaction of the surface layer while maintaining surface humidity — critical for the seedling's first push upward through the substrate.

In a small seedling pot or plug, this may mean no more than a few millilitres of water per misting session. The goal is to maintain moisture, not add volume.

Watering Frequency at the Seed Stage

There is no universal schedule — it depends on your container size, substrate, ambient temperature, and humidity. Instead of watering on a timer, learn to read the substrate:

  • Lift the pot: a dry pot is noticeably lighter. This is the most reliable method.
  • Finger test: insert your finger 1–2 cm into the substrate. If it feels dry at that depth, it is time to mist.
  • Visual check: the surface of the substrate will lighten in colour as it dries.

In warm conditions (24–26°C) with small containers, you may need to mist once or twice daily. In cooler, more humid environments, once every 24–48 hours may be sufficient.

Checking soil moisture level with finger test during seed germination

Water Temperature and Quality

Cold water can shock germinating seeds and slow the metabolic processes that drive sprouting. Always use water at room temperature — ideally 20–22°C. Regarding water quality:

  • Tap water: let it sit uncovered for 24 hours to allow chlorine to off-gas before use, or use a carbon filter.
  • RO water: reverse osmosis water is pH-neutral and free of contaminants, but may need a small amount of CalMag added to avoid mineral deficiencies in very young seedlings.
  • Rainwater: excellent if collected cleanly, though pH should still be checked and adjusted if necessary.

Humidity Domes and Moisture Retention

A clear plastic humidity dome placed over your seedling tray dramatically reduces surface evaporation and maintains the stable moisture environment seeds need. Most commercial seedling trays come with a matching dome. If you do not have one, a clear plastic bag loosely placed over the pot works as a substitute.

Lift the dome briefly once or twice a day to allow fresh air exchange and prevent CO₂ buildup. Once the seedling has emerged and the first true leaves begin to develop, start removing the dome for progressively longer periods to harden the plant off.

Humidity dome covering cannabis seedlings to maintain moisture during germination

Common Watering Mistakes at the Seed Stage

  • Overwatering: the single most common mistake. Saturated substrate leads to oxygen deprivation, damping off, and root rot. When in doubt, wait.
  • Underwatering: equally damaging. A seed that dries out mid-germination rarely recovers.
  • Using cold water: slows germination and can cause stress.
  • Watering with force: a strong stream of water can bury a seed too deep or dislodge a sprouting taproot. Always use a gentle misting spray.
  • Ignoring pH: incorrect pH locks out the minimal mineral uptake the seedling needs in its first days.

Transitioning to Seedling Watering

Once the seedling has fully emerged and opened its cotyledons (the first round seed leaves), watering technique shifts slightly. You can begin watering in a small circle around the base of the seedling rather than misting the entire surface. This encourages the taproot to grow downward and outward in search of moisture — the beginning of the root development that will support the plant through its entire life.

Mastering seed-stage watering is fundamentally about restraint and observation. The less you interfere and the more you pay attention to what the substrate is telling you, the better your germination rates will be.


Fertilization

Beginner 5 min read

Introduction

Cannabis seeds and freshly germinated seedlings require almost no external nutrition. In fact, feeding too early is one of the most common and damaging mistakes a grower can make at this stage. Understanding what a seed actually needs — and more importantly, what it does not need — is the foundation of healthy early growth. This guide explains the nutritional reality of the seed stage and when, if ever, to begin introducing nutrients.

Young cannabis seedling in substrate with minimal nutrient requirements

What a Seed Already Contains

A cannabis seed is a self-contained unit. Inside its shell, the embryo is surrounded by an endosperm — a nutrient reserve that fuels everything from germination through the development of the first true leaves. This internal supply covers the seedling's needs for approximately the first 1–2 weeks of life, depending on conditions and substrate.

This means that for the first week or two after germination, the plant does not need you to feed it. What it needs is the right substrate, correct moisture, and appropriate light.

The Role of the Substrate

The substrate you choose determines how long you can go without supplemental feeding. A quality pre-amended potting mix designed for seedlings will contain low but sufficient levels of nutrients to carry the plant well beyond its first two weeks. Look for substrates with an EC (electrical conductivity) of around 0.6–1.0 mS/cm — enough to support early growth without burning tender roots.

  • Seedling-specific mixes: light, airy, low in nutrients — ideal for the first 2–3 weeks.
  • Standard potting soil: often too rich for seeds but acceptable if diluted with perlite.
  • Coco coir: inert and contains zero nutrients — requires nutrient supplementation from the very first watering, at very low doses.
  • Rockwool or clay pebbles: fully inert; nutrients must be introduced immediately but at extremely low concentrations.

Different substrate types for cannabis seedlings including soil and coco coir

When to Start Feeding

The right time to introduce nutrients depends on your substrate and the plant's visible development:

  • In pre-amended soil: wait until the plant has developed its second or third set of true leaves — typically 2–3 weeks after germination — before introducing any supplemental nutrients.
  • In coco coir or inert media: begin feeding from the first watering after germination, but at a very low EC — no more than 0.4–0.6 mS/cm.
  • Visual cues: slight yellowing of the cotyledons (the first round leaves) is a natural signal that the seed's internal reserves are depleted and the plant is ready to begin absorbing nutrients from the substrate.

What Nutrients to Use at the Seed Stage

If you do need to feed at the seed stage, keep it minimal and balanced. Avoid high-nitrogen vegetative boosters — they are far too aggressive for a seedling's undeveloped root system.

  • Seedling-specific formulas: many nutrient brands offer a dedicated seedling formula with a gentle, balanced NPK ratio. These are the safest choice.
  • Diluted base nutrients: if using a standard two or three-part nutrient system, start at no more than 25% of the recommended dose and increase gradually.
  • Organic teas: a very lightly brewed worm casting tea or kelp tea can provide gentle, bioavailable nutrition with minimal risk of burn.

Seedling nutrient solution being prepared at low concentration for young cannabis plants

Signs of Nutrient Burn at the Seed Stage

Seedlings show nutrient burn quickly and dramatically. The symptoms appear within 24–48 hours of overfeeding and include:

  • Tip burn: the tips of the cotyledons or first true leaves turn yellow or brown and curl downward.
  • Leaf crinkling or cupping, often combined with an unusually dark green colour.
  • Stunted growth or complete cessation of new leaf development.

If you see these signs, flush the substrate immediately with pH-adjusted plain water and withhold nutrients for at least one week. Seedlings recover slowly from nutrient burn — prevention is far easier than cure.

Cannabis seedling showing signs of nutrient burn with yellowing leaf tips

pH and EC: The Two Numbers That Matter Most

At the seed stage, pH management is more critical than the specific nutrients you use. Incorrect pH locks out mineral uptake regardless of what is in your solution. Target ranges:

  • Soil: pH 6.0–6.5
  • Coco coir: pH 5.8–6.2
  • Hydroponics: pH 5.5–6.1

For EC, keep the solution below 0.8 mS/cm until the plant has at least three sets of true leaves. After that, you can begin following the ramp-up schedule appropriate for the vegetative stage.

Organic vs. Synthetic Nutrition at the Seed Stage

Organic nutrition is generally more forgiving at the seed stage because organic nutrients release slowly and are buffered by microbial activity in the soil. A living soil rich in beneficial bacteria and fungi will self-regulate nutrient availability to some degree, making it harder to overfeed. Synthetic nutrients, by contrast, are immediately available to roots and much easier to overapply. If you are new to growing, an organic seedling mix is the lowest-risk starting point.

The Golden Rule

If you take nothing else from this guide, remember this: less is more at the seed stage. A seedling that is slightly underfed will catch up quickly once it enters the vegetative stage. A seedling that has been overfed may never fully recover. When in doubt, wait another week before introducing nutrients and let the plant tell you through its growth and leaf colour what it needs.


Germination Methods

Beginner 5 min read

Introduction

Germination is the moment a cannabis seed transitions from dormancy to life. It is a simple biological process, but one that benefits enormously from the right technique and environment. There are several reliable methods for germinating cannabis seeds, each with its own advantages and tradeoffs. This guide covers the most widely used approaches in detail, so you can choose the one that best fits your setup and experience level.

Cannabis seeds beginning to germinate showing white taproots emerging

What Happens During Germination

When a cannabis seed absorbs sufficient moisture, its internal metabolic processes activate. The embryo begins consuming its endosperm (nutrient reserve), the seed coat softens, and a white taproot — called the radicle — emerges from the pointed end of the seed. This taproot is the foundation of the plant's root system. Once it reaches approximately 1–2 cm in length, the seed is ready to be placed into its growing medium.

The ideal conditions for germination are consistent across all methods:

  • Temperature: 22–26°C (72–79°F)
  • Humidity: 70–90% RH
  • Darkness: seeds germinate best without light exposure
  • Gentle handling: the taproot is extremely fragile — never touch it with bare fingers if avoidable

Method 1: Paper Towel (Most Popular)

The paper towel method is the most widely used technique among home growers. It is simple, requires no special equipment, and allows you to visually monitor the taproot's development before committing the seed to substrate.

  • Step 1: Dampen two sheets of plain white paper towel with pH-adjusted water (6.0–6.5). They should be moist but not dripping.
  • Step 2: Place your seeds on one sheet, spaced apart, and fold the second sheet over the top.
  • Step 3: Place the paper towel inside a sealed ziplock bag or between two plates to retain moisture.
  • Step 4: Store in a warm, dark place — the top of a cable box, inside a cabinet near a heat source, or in a dedicated germination mat.
  • Step 5: Check every 12–24 hours. Most seeds will show a taproot within 24–72 hours. Once the taproot reaches 1–2 cm, transfer carefully to your substrate.

Advantage: visible progress, easy monitoring. Risk: taproot can dry out if the towel is not kept moist, and handling can damage the fragile root.

Cannabis seeds germinating on moist paper towel inside a sealed bag

Method 2: Direct Planting in Substrate

Direct planting skips the paper towel entirely and places the seed directly into its growing medium. This is the lowest-stress method for the plant, as the taproot never needs to be transferred once emerged — it simply grows down into the substrate from the start.

  • Step 1: Pre-moisten your substrate to field capacity (damp throughout, not saturated).
  • Step 2: Use a pen or finger to make a small hole approximately 5–10 mm deep.
  • Step 3: Drop the seed in, pointed end down if possible, and cover lightly with loose substrate.
  • Step 4: Mist the surface and cover with a humidity dome or plastic wrap.
  • Step 5: Keep in a warm, dark location. The seedling should emerge from the substrate within 2–5 days.

Advantage: zero handling of the taproot, lowest risk of mechanical damage. Risk: you cannot monitor progress, and a failed seed must be dug up to confirm.

Cannabis seed being placed directly into pre-moistened substrate for germination

Method 3: Glass of Water (Soaking)

Soaking seeds in a glass of water is an effective way to kickstart germination, especially for older or harder-shelled seeds that may be slow to respond to moisture alone. The water penetrates the seed coat quickly, activating germination faster than dry-to-moist methods.

  • Step 1: Fill a small glass with room-temperature water (20–22°C) and adjust pH to 6.0–6.5.
  • Step 2: Drop your seeds into the glass. Seeds that float initially are not necessarily bad — many will sink within a few hours as they absorb water.
  • Step 3: Place the glass in a warm, dark location.
  • Step 4: Check every 12 hours. After 12–24 hours, seeds that are still floating can be gently pushed under the surface.
  • Step 5: Once the taproot emerges (usually within 24–48 hours), transfer immediately to substrate or paper towel to complete development. Do not leave seeds soaking for more than 32 hours as oxygen deprivation becomes a risk.

Advantage: fast, effective for tough-shelled seeds. Risk: easy to over-soak, which can drown the seed.

Cannabis seeds soaking in a glass of water to initiate germination

Method 4: Seedling Plugs and Starter Cubes

Rockwool cubes, peat plugs (such as Jiffy pellets), and coco coir starter plugs are purpose-built germination media designed to provide ideal moisture retention and aeration. They are widely used by professional and commercial growers and are equally accessible to home cultivators.

  • Step 1: Soak the plug or cube in pH-adjusted water (5.5–6.0 for rockwool, 6.0–6.5 for peat or coco) for 15–30 minutes, then allow excess water to drain.
  • Step 2: Place one seed per plug into the pre-formed hole, approximately 5 mm deep.
  • Step 3: Pinch the hole closed gently over the seed.
  • Step 4: Place plugs in a humidity tray with a dome and keep in a warm environment.
  • Step 5: The seedling will emerge within 2–5 days. Once roots are visible at the bottom of the plug, it is ready to transplant directly into its next container — no root disturbance required.

Advantage: clean, consistent, transplants without root disturbance. Risk: rockwool requires careful pH management and can dry out quickly if not monitored.

Cannabis seeds germinating in rockwool starter cubes inside a humidity tray

Comparing the Methods

  • Paper towel: best for monitoring, good for beginners, requires careful handling at transfer.
  • Direct planting: lowest stress for the plant, best for experienced growers confident in their substrate moisture management.
  • Water soaking: best for old or hard-shelled seeds, should be combined with paper towel or direct planting to complete germination.
  • Starter plugs: most professional option, ideal for growers who transplant frequently or run hydroponic systems.

Troubleshooting: When Seeds Don't Germinate

  • No taproot after 5 days: check temperature (too cold is the most common cause), re-moisten your paper towel or substrate, and wait up to 7 days before declaring a seed a failure.
  • Taproot emerged but seedling won't push through substrate: the seed may have been planted too deep, or the substrate surface may have crusted over. Gently loosen the surface around the seed's location.
  • Seed coat stuck on seedling: this is common when humidity is too low. Increase humidity and mist the stuck shell lightly with water. In most cases it will fall away on its own within 24 hours.
  • Mold on paper towel: reduce moisture slightly, ensure air exchange, and transfer seeds to substrate immediately.

Germination is the shortest phase of the cannabis lifecycle but one of the most formative. The method you choose matters less than the consistency and care with which you execute it. Give your seeds warmth, moisture, and darkness — and they will do the rest.